
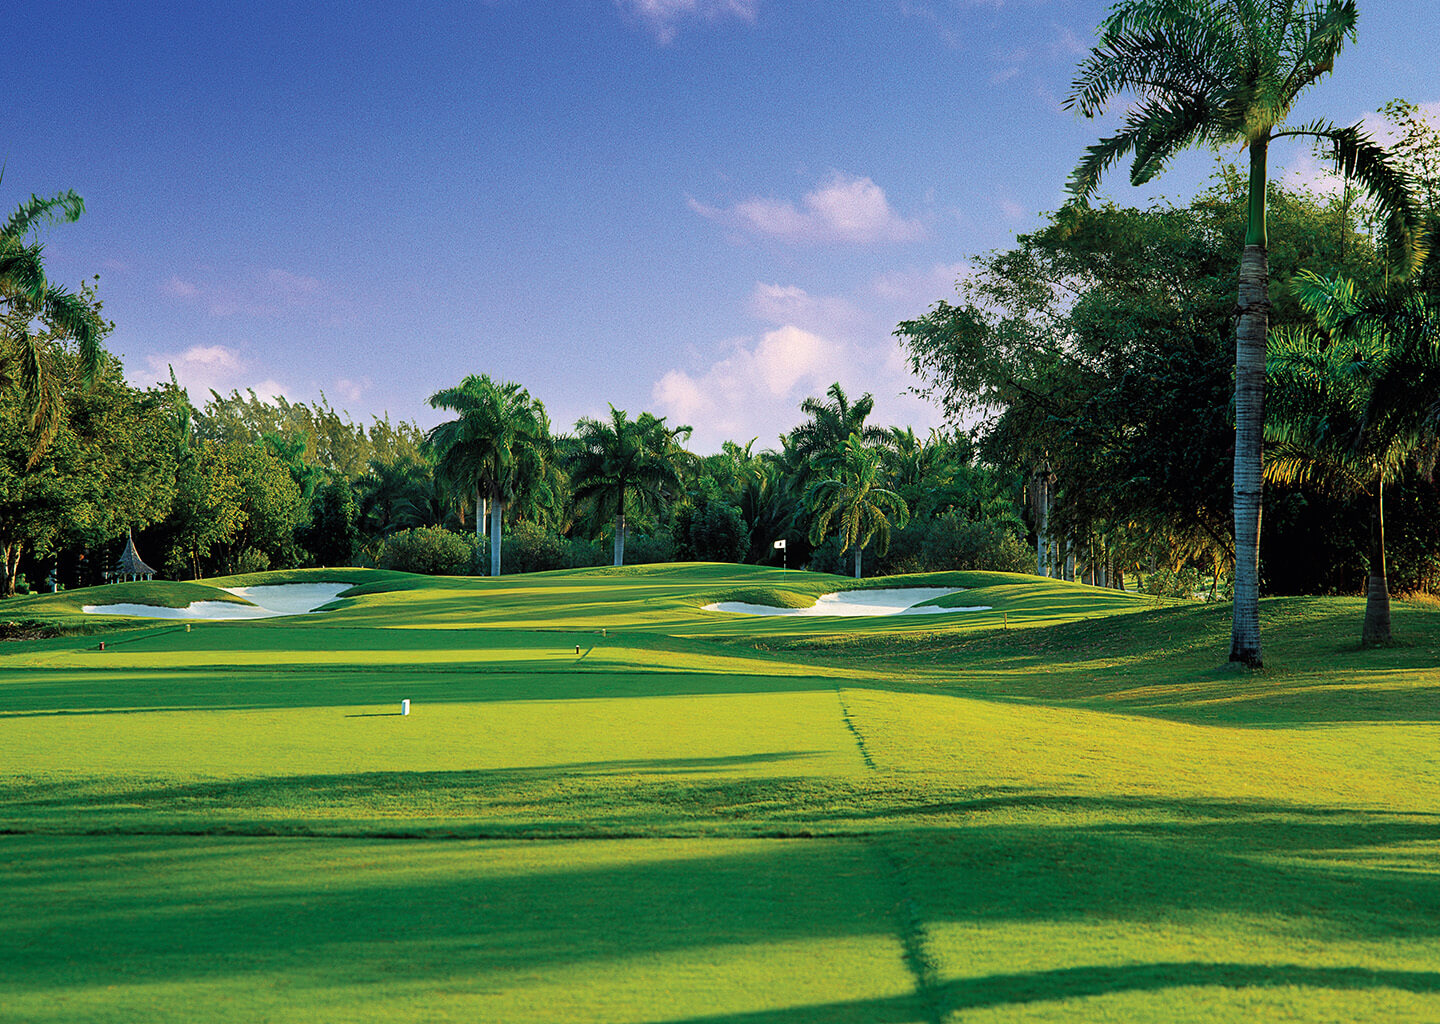

Hole Description
Golf Hole Videos
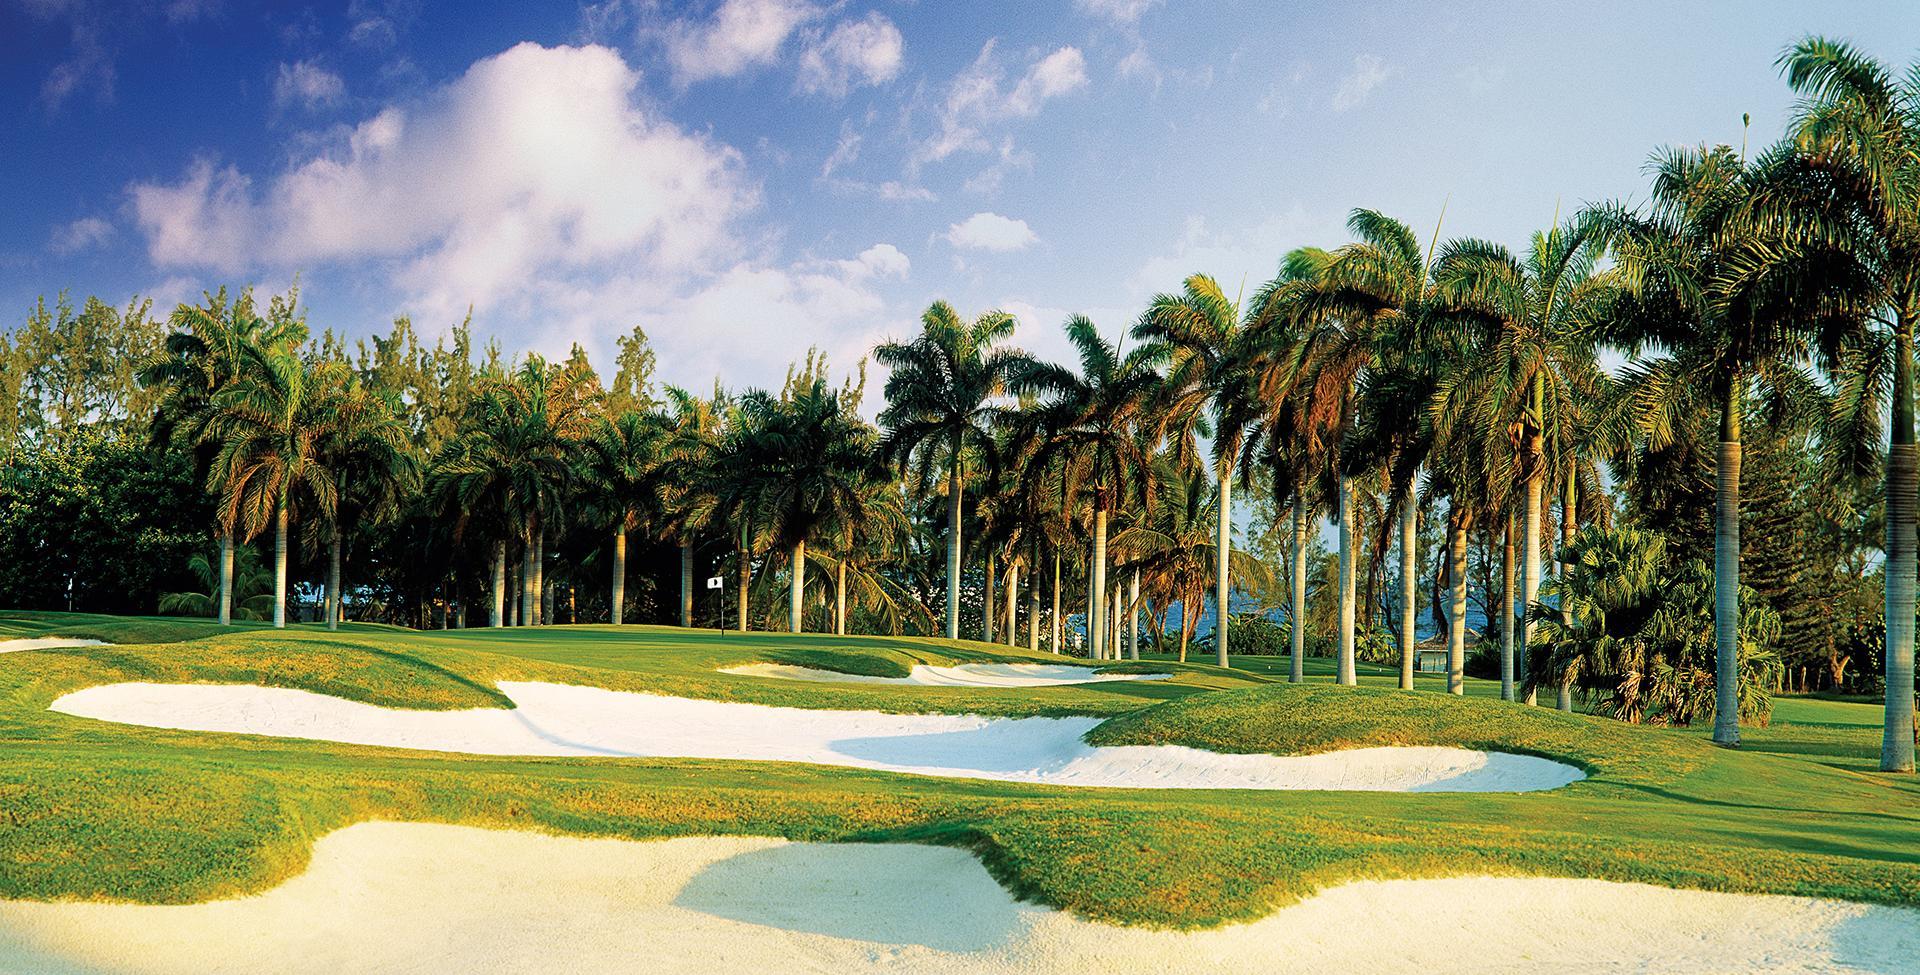
HOLE 1
- Black Tees - 564 yds
- White Tees - 530 yds
- Red Tees - 440 yds
- Yellow Tees - 408 yds
The opening hole at Half Moon is a Par five usually played into the prevailing wind. Out of bounds left and a well bunkered, sloping green complex makes the approach shot into this green key to ensure a less difficult putt.
HOLE 2
- Black Tees - 385 yds
- White Tees - 354 yds
- Red Tees - 315 yds
- Yellow Tees - 283 yds
A narrow tee shot, slightly uphill, with a ditch in front of the green. Emphasis on Tee shot placement to allow the second shot into this well bunkered green.
HOLE 3
- Black Tees - 209 yds
- White Tees - 189 yds
- Red Tees - 134 yds
- Yellow Tees - 109 yds
A well designed green, wide but with not too much depth, guarded by a front bunker gives the player options as to how aggressive he chooses to be.
HOLE 4
- Black Tees - 425 yds
- White Tees - 400 yds
- Red Tees - 351 yds
- Yellow Tees - 294 yds
Out of bounds left but with plenty of room to the right. The fairway is guarded by two perfectly placed bunkers and a large green makes the approach shot receptive to a well struck shot.
HOLE 5
- Black Tees - 450 yds
- White Tees - 418 yds
- Red Tees - 386 yds
- Yellow Tees - 334 yds
An excellent hole that gives many options depending on the players strengths. Three fairway bunkers suggest to the player to either stay left and have a longer second shot or risk trying to carry the ball over the first bunker to shorten the hole. It is also possible to play to the right of the bunkers but the risk of being blocked out by the majestic Royal Palms awaits if incorrectly struck. A slightly raised green makes pitching difficult so emphasis is on hitting this green.
HOLE 6
- Black Tees- 383 yds
- White Tees - 351 yds
- Red Tees - 319 yds
- Yellow Tees - 292 yds
One of the shorter par 4’s on the golf course, but also one of the most difficult. The undulating green makes the placement of the approach shot extremely important. The green is also protected by a ditch in front of the green and a heavily bunkered fairway makes tee shot placement of paramount importance. A true test for experienced golfer and novice alike.
HOLE 7
- Black Tees - 164 yds
- White Tees - 133 yds
- Red Tees - 100 yds
- Yellow Tees - 100 yds
A relatively short par 3 but usually played into a slight cross wind. Club selection is key, highly recommended to listen to your caddies advice!
HOLE 8
- Black Tees - 575 yds
- White Tees - 543 yds
- Red Tees - 466 yds
- Yellow Tees - 393 yds
A classic three shot par 5 for the majority of golfers but allowing the long hitters to try to clear the bunker from the tee shot will find a long iron into the green for the second. Players are advised to stay left of the fairway bunker which will leave them a long second shot, setting up a pitch into the green.
HOLE 9
- Black Tees - 428 yds
- White Tees - 383 yds
- Red Tees - 346 yds
- Yellow Tees - 292 yds
A narrow fairway with out of bounds left and a well placed bunker to the right. The green is protected by a ditch in front, water left and a deep front bunker. An undulating green makes a two putt anything but guaranteed. Distance control on the approach is critical-the green slopes severely from back to front, and nobody wants to be past the pin.
HOLE 10
- Black Tees - 573 yds
- White Tees - 537 yds
- Red Tees - 502 yds
- Yellow Tees - 455 yds
A slightly downhill par five, usually played with a helping wind will find the longer hitters trying to take advantage of this hole. Be sure to stay left on the second shot if not attempting to hit the green in two. The green is slightly raised and not possible to see the bottom of the flag. Make sure you listen to your caddy when he gives you a yardage. This a hole that will ask you how confident do you think you are?
HOLE 11
- Black Tees - 409 yds
- White Tees - 378 yds
- Red Tees - 378 yds
- Yellow Tees - 315 yds
An elevated tee shot gives a perfect view of what lays before the player. For the longer hitters, a decision must be made on the tee to either stay short of the right hand bunker or attempt to thread it between the two fairway bunkers. A narrow, sloping green makes accuracy crucial on the approach shot.
HOLE 12
- Black Tees - 570 yds
- White Tees - 535 yds
- Red Tees - 501 yds
- Yellow Tees - 420 yds
A truly challenging drive with a bunker left forcing the player to the right and making the hole longer. Fairway bunkers short of the green force the player into making a decision to either carry them or stay short. It is essential to stay short of the hole when playing the approach as a severely sloping green from back to front make putting downhill not the easiest of tasks.
HOLE 13
- Black Tees - 350 yds
- White Tees - 314 yds
- Red Tees - 280 yds
- Yellow Tees - 243 yds
A redesign in 2005 by Roger Rulewich created this masterpiece of strategy. A ditch runs left of the fairway and in front of the green. The closer the player wishes to get to the ditch, the easier the approach shot. Tee shots that stray too far right will leave a downhill sloping approach shot into a raised green, never easy. Distance control on the approach shot is incredibly important.
HOLE 14
- Black Tees - 158 yds
- White Tees - 158 yds
- Red Tees - 132 yds
- Yellow Tees - 98 yds
This hole begins the homeward stretch with the next five holes usually played into the strong Trade Winds. A visually enticing par 3, slightly uphill and into the breeze will add two clubs to the shot selection. Players would be advised to stay under the hole to avoid a difficult chip or putt.
HOLE 15
- Black Tees - 453 yds
- White Tees - 422 yds
- Red Tees - 354 yds
- Yellow Tees - 320 yds
A generous fairway width will encourage players to open their shoulders on this long par 4. Out of bounds left, however, will catch an errant tee shot. From the Championship Tees a second shot is usually played with a medium to long iron into a well bunkered green complex.
HOLE 16
- Black Tees - 401 yds
- White Tees - 369 yds
- Red Tees - 310 yds
- Yellow Tees - 271 yds
From the tee a small water hazard forces players to the left where out of bounds waits. If possible to thread a shot between the two fairway bunkers, a short to medium iron for the approach shot to an elevated green awaits.
HOLE 17
- Black Tees - 204 yds
- White Tees - 163 yds
- Red Tees - 163 yds
- Yellow Tees - 122 yds
A wide green with little depth makes a par on the penultimate hole very welcome. Heavily bunkered left with an extremely difficult pitch if long, leaves little room to bailout. Players must commit to the shot and trust their caddy!
HOLE 18
- Black Tees - 440 yds
- White Tees - 404 yds
- Red Tees - 358 yds
- Yellow Tees - 281 yds
With the clubhouse in sight, everyone is looking for their longest tee shot to enable an approach to a green angled away from the player left to right. The fairway bunker of the right hand side is reachable and suggests to the golfer that left may be the best option. The second shot has little room for error for players attacking the hole and a par 4 is especially satisfying for players protecting a good score.